

Taking care of your motorcycle is essential for ensuring its longevity and optimal performance. Regular maintenance allows you to enjoy safe rides, avoid costly repairs, and make your motorcycle ownership experience more pleasurable. If you’re just starting out, having a structured approach to routine care can seem overwhelming, but it doesn’t have to be.
This comprehensive checklist will guide you through the crucial components of motorcycle maintenance, giving you the confidence to tackle basic tasks on your own. Familiarizing yourself with what needs to be done will not only save you time and money but will also enhance your understanding of how your motorcycle functions.
By establishing a routine maintenance schedule, you can easily keep track of what needs attention and when. Whether it’s checking oil levels, inspecting brakes, or ensuring tire pressure is optimal, each step is vital for your safety on the road. Let’s dive into the essential tasks every motorcycle owner should consider for effortless care.
Essential Fluids: Checking Oil, Brake Fluid, and Coolant Levels

Routine maintenance of your motorcycle includes regular checks of essential fluids to ensure optimal performance and safety. The three critical fluids that need attention are engine oil, brake fluid, and coolant. Each plays a vital role in the overall functioning of the motorcycle.
To begin with, checking the engine oil level is fundamental. Engine oil lubricates moving parts, prevents overheating, and helps clean the engine. Ideally, check the oil level when the engine is cool. Use the dipstick or sight glass, ensuring the motorcycle is on level ground. If the oil is low, top it up with the manufacturer-recommended type. Additionally, consider changing the oil and oil filter at regular intervals as per your motorcycle’s maintenance schedule.
Next, brake fluid is essential for safe stopping power. Insufficient brake fluid can lead to brake failure. To check the fluid level, locate the brake fluid reservoir, usually situated near the handlebars for the front brake and near the rear wheel for the back brake. The fluid should be clear, and you should replace it if it appears dark or has debris. It is important to ensure that the fluid level is within the manufacturer-specified range, and top it up as necessary to maintain optimal braking performance.
Lastly, coolant levels are crucial for preventing engine overheating. Check the coolant reservoir, typically marked with minimum and maximum lines. Coolant should be a vibrant color and free from contaminants. If the level is below the minimum mark, add the appropriate coolant mixture as recommended by the manufacturer. Regularly inspecting and maintaining coolant levels can prolong engine life and enhance performance.
In summary, maintaining the essential fluids of your motorcycle–oil, brake fluid, and coolant–is a straightforward yet critical part of routine maintenance. By regularly checking these levels, you ensure your motorcycle operates efficiently, safely, and reliably, reducing the risk of costly repairs in the future.
Tire Maintenance: Pressure Checks and Tread Depth Evaluation
Proper tire maintenance is crucial for the safety and performance of your motorcycle. Regular routine checks of tire pressure and tread depth will not only enhance your riding experience but also extend the life of your tires.
Pressure Checks
Maintaining the correct tire pressure is essential for optimal grip, fuel efficiency, and overall handling. You should check the tire pressure at least once a month, and before any long trip. Use a reliable tire pressure gauge to ensure accuracy. The ideal pressure levels can usually be found in the owner’s manual or on a sticker located on the motorcycle itself.
When checking pressure, do it when the tires are cold, as heat from riding can increase the pressure readings. If the pressure is too low, inflate the tire to the recommended level. Conversely, if the pressure is too high, release some air. A balanced tire pressure reduces the risk of blowouts and enhances stability on the road.
Tread Depth Evaluation
The tread depth of your motorcycle tire affects traction and handling, especially in wet conditions. To evaluate the tread depth, use a tread depth gauge or the penny test. Insert a penny into the tread with Lincoln’s head facing down; if you can see all of Lincoln’s head, it’s time to replace the tire.
Inspect the tires regularly for uneven wear patterns, which may indicate alignment issues or other mechanical problems. If the tread is worn down beyond safe levels, replacing the tire promptly is advisable to ensure rider safety.
Incorporating these maintenance practices into your routine will help keep your motorcycle in excellent condition and promote safer rides. Regular checks not only enhance your bike’s performance but also provide peace of mind while on the road.
Electrical Systems: Testing Battery, Lights, and Indicators
Proper maintenance of your motorcycle’s electrical systems is essential for ensuring safe and reliable performance. Regularly testing components such as the battery, lights, and indicators can help identify potential issues before they become significant problems. Follow this simple routine to maintain your motorcycle’s electrical integrity.
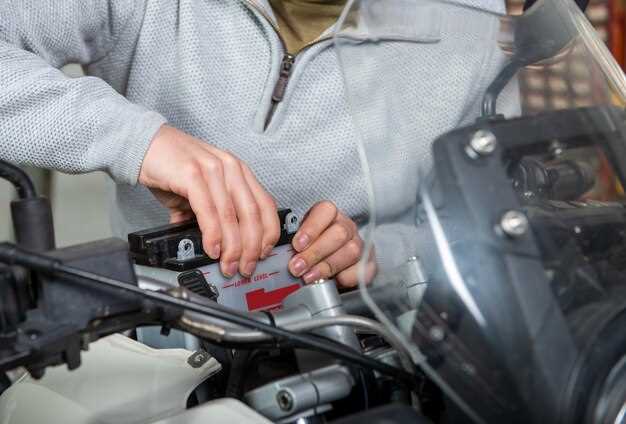
Testing the Battery: Start by checking the battery voltage using a multimeter. A healthy motorcycle battery should measure around 12.6 volts or higher when fully charged. If the voltage falls below 12.4 volts, consider charging the battery or replacing it if it’s old. Additionally, inspect battery terminals for corrosion and ensure all connections are tight. Clean any corrosion with a mixture of baking soda and water, facilitating better conductivity.
Inspecting the Lights: Next, turn on your motorcycle and test all lights, including headlights, taillights, and turn signals. Ensure that each bulb illuminates correctly. If a light fails to work, check for burnt-out bulbs and replace them as necessary. Additionally, examine the wiring for any signs of damage or loose connections that may hinder performance.
Checking Indicators: Make sure that the indicators flash at the correct rate when engaged. A rapid flash often indicates a burnt-out bulb, while a slow flash can suggest a wiring issue. Test the horn in conjunction with the indicators to confirm that the fuse protecting these circuits is functioning properly. If issues persist, consult your motorcycle’s manual for guidance on locating specific fuses and potential fixes.
By regularly performing these checks, you can keep your motorcycle’s electrical systems in optimal condition, ensuring a safer and more enjoyable riding experience. Remember, proactive maintenance is always better than reactive repairs.