

The fairing of a motorcycle is an essential component that not only enhances the aesthetic appeal but also improves aerodynamics and protection. However, cracks can occur due to various factors such as accidents or wear and tear. A cracked fairing not only affects the look of your bike but can also lead to further damage if left unattended. This guide will walk you through the straightforward steps to repair your motorcycle’s fairing effectively.
Repairing a cracked fairing may seem daunting, but with the right tools and techniques, it can be accomplished easily and affordably. Whether you are an experienced motorcycle enthusiast or a novice, understanding the repair process can save you time and money. In this article, we will cover the necessary materials, preparation steps, and the actual repair process to help you restore your fairing to its former glory.
By following these simple steps, you can ensure that your motorcycle maintains its performance and remains visually appealing. Let’s dive into the world of fairing repair and empower you to take action on your motorcycle maintenance.
Gathering the Right Materials for Plastic Repair
To effectively repair a cracked fairing, it is crucial to gather the appropriate materials for plastic repair. The first essential item is plastic adhesive, specifically formulated for bonding plastics. Look for products that promise strong adhesion and flexibility, as they will provide the best results when dealing with fairings.
Next, you will need a plastic filler or epoxy designed for plastic surfaces. This material will help fill in any gaps or imperfections in the cracked area, ensuring a smooth finish. Ensure it is compatible with the type of plastic used in your fairing.
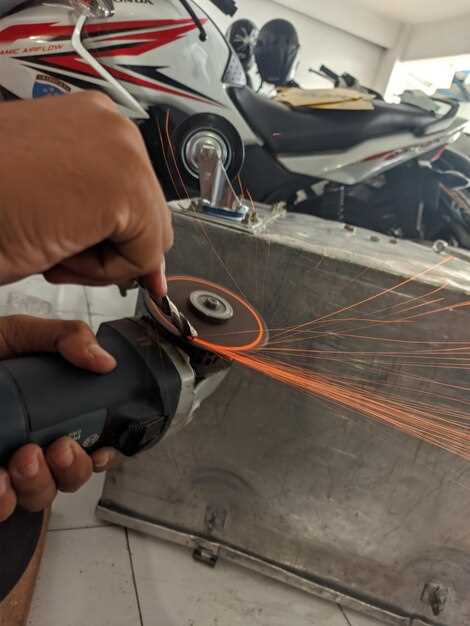
In addition to adhesive and filler, sandpaper in various grits is necessary to prepare the surface and achieve a seamless repair. Begin with a coarser grit to remove any debris and roughen the area around the crack, then move to finer grits for smoothing the filler once it has cured.
Finally, consider acquiring a heat gun. This tool can be instrumental in softening the plastic along the cracks, allowing for better adhesion and shaping of the material during the repair process. Always prioritize safety by wearing gloves and protective eyewear while working with these materials.
Preparing the Cracked Area Before Applying Repairs
Before proceeding with the repair of a cracked fairing on your motorcycle, it is essential to properly prepare the affected area. This preparation is crucial for ensuring a strong bond and a seamless finish post-repair.
First, clean the cracked surface thoroughly. Use a mild soap solution and a soft cloth to remove dirt, grease, and debris. This step is vital as contaminants can affect the adhesion of the repair materials to the plastic.
Once the area is clean, inspect the crack closely. Identify the extent of the damage and determine if there are any additional stress points nearby. If the crack is large or there are multiple fractures, consider reinforcing the area with additional materials such as fiberglass for added strength.
Next, sand the edges of the crack lightly with fine-grit sandpaper. This will help create a rough surface for the adhesive to grip effectively. Be cautious not to sand too deeply or damage the surrounding area.
After sanding, remove any dust particles using a clean, dry cloth. Ensuring that the surface is dust-free will enhance the bond during the repair process.
Finally, if the crack extends beyond the surface, fill it with a suitable plastic filler that matches the fairing material. Allow the filler to cure as per the manufacturer’s instructions before proceeding with the repair.
Preparing the cracked area correctly sets the foundation for an effective and long-lasting repair, ensuring your motorcycle fairing looks and performs as it should.
Finishing Touches: Sanding and Painting the Repaired Fairing
After successfully completing the repair of your fairing, the next crucial step involves sanding and painting to restore its original appearance and ensure durability. Proper preparation is key to achieving a smooth finish.
Begin by selecting the appropriate sandpaper for the plastic surface. Start with a coarser grit, such as 150 or 220, to smooth out any raised areas from the repair. Sand gently and evenly until the surface feels uniform. Be cautious not to over-sand, which might damage the surrounding areas.
Once the initial sanding is complete, switch to a finer grit sandpaper, around 400 to 600. This step helps eliminate any scratches left by the coarser sandpaper, leading to a polished finish. Wipe the surface clean with a damp cloth to remove dust before moving to the painting process.
Choose a paint designed specifically for plastic, as this ensures better adhesion and durability. A spray paint formulation is often best for providing an even coat. Before applying paint, spray a test area to verify compatibility and ensure desired color matches.
Apply the paint in thin, even layers, allowing each coat to dry completely before adding the next. This method prevents drips and runs, leading to a professional-looking finish. Depending on the color and type of plastic, two to three coats may be necessary for full coverage.
After the final coat has dried, consider sealing the newly painted fairing with a clear coat. This step adds extra protection against the elements and enhances the gloss finish. Allow it to cure according to the manufacturer’s instructions to ensure optimal results.
With the repairs, sanding, and painting completed, your fairing should now look as good as new. Proper care and maintenance will help preserve its appearance and prolong its lifespan.