

Motorcycles are known for their thrilling rides and the freedom they offer, but like any mechanical system, they can encounter electrical issues that may disrupt their performance. Understanding the most common problems involving wiring and electrical components is essential for every motorcycle owner. Addressing these problems promptly can not only enhance the longevity of your motorcycle but also ensure a safe riding experience.
Electrical problems can manifest in various forms, from flickering lights to complete power failure. Issues often arise due to faulty wiring, corroded connections, or even simple battery failures. For instance, a weak battery or damaged wiring can lead to starting issues, which are both frustrating and inconvenient. Identifying and resolving these problems early can save time and prolong the life of your motorcycle’s electrical system.
As we dive deeper into the common electrical issues faced by motorcycle enthusiasts, we will explore comprehensive solutions that can help riders troubleshoot and rectify these challenges. Whether it’s a minor wiring issue or a more complex electrical conundrum, being informed will empower you to maintain your motorcycle in top condition.
Troubleshooting Common Motorcycle Wiring Problems
Dealing with electrical issues in a motorcycle can often be frustrating, especially when it comes to wiring. Electrical problems may manifest in various ways, including non-starting engines, flickering lights, or intermittent faults. Understanding these common wiring problems and their solutions can save you time and money.
1. Check for Loose Connections
One of the first steps in wiring troubleshooting is to examine all connections. Loose or corroded connections can lead to poor electrical contact, causing various symptoms. Ensure all connectors are tightly secured and clean any corrosion with a suitable cleaner.
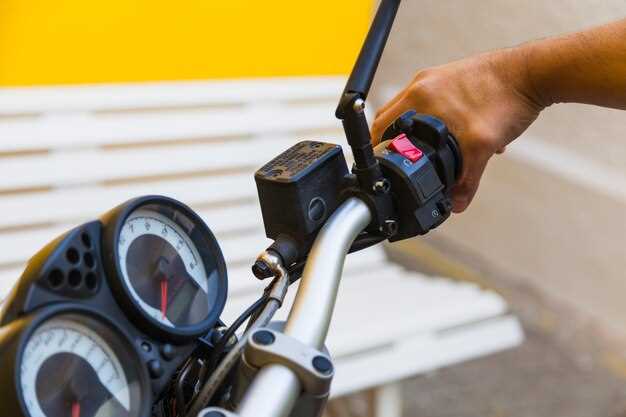
2. Inspect Wiring for Damage
Inspect the wiring harness for any visible signs of wear, fraying, or cuts. Damaged wires can cause short circuits or open circuits, resulting in electrical failures. Replace any damaged sections and use electrical tape or heat shrink tubing to protect repairs.
3. Test the Battery and Charging System
A weak or faulty battery can create the illusion of wiring problems. Use a multimeter to check the voltage; a healthy battery should read around 12.6 volts. Additionally, ensure the charging system is functioning properly, with the voltage increasing to about 13.5 to 14.5 volts when the engine is running.
4. Diagnose Ground Issues
Ground problems are common culprits behind electrical failures. Ensure that all ground points are clean and securely attached to the frame or engine. A poor ground can cause electrical components to behave erratically.
5. Check Fuses and Relays
Fuses protect the wiring by breaking the circuit during overloads. If you experience issues with specific electrical components, check the relevant fuses. Replace any burnt fuses and inspect relays for proper functioning, as they control various circuits within your motorcycle.
6. Use a Wiring Diagram
For complex wiring issues, a wiring diagram specific to your motorcycle model can be invaluable. This tool helps trace circuits and identify potential problem areas, making troubleshooting much easier and more systematic.
Conclusion
By systematically addressing these troubleshooting steps, you can effectively identify and resolve common wiring problems in your motorcycle. Keeping your electrical system in good condition not only enhances performance but also ensures a safer riding experience.
Diagnosing Battery and Charging System Failures
When experiencing electrical issues with your motorcycle, diagnosing battery and charging system failures is crucial. Start by checking the battery voltage using a multimeter; a healthy battery should read around 12.6 volts when fully charged. If the voltage is significantly lower, the problem may lie within the battery itself, leading to insufficient power for the electrical systems.
Next, inspect the wiring for any signs of damage or corrosion. Damaged cables can lead to poor connectivity, resulting in electrical problems. Ensure all connections are clean and tight, as loose wiring can also hinder the charging process. Pay particular attention to the ground connections, as a bad ground can disrupt the flow of electricity.
After confirming the battery status and inspecting the wiring, test the stator and rectifier. The stator generates electricity while the rectifier converts AC to DC. A malfunctioning stator may indicate a failure to charge the battery properly. Use a multimeter to check the AC voltage output from the stator; if the readings are outside the normal range, it may need to be replaced.
Subsequently, assess the rectifier by checking the DC output; it should produce approximately 14 volts when the engine is running. If the voltage is not as expected, this component may also require replacement. Finally, if all components check out and issues persist, consider examining the motorcycle’s electrical load, as excessive draw from accessories can lead to charging failures.
Repairing and Replacing Faulty Electrical Components

When faced with electrical problems on a motorcycle, identifying the faulty components is crucial for effective repairs. Common issues include malfunctioning start switches, damaged wiring, and failing relays. Conduct a thorough inspection, starting with the battery. A weak or dead battery can lead to numerous electrical issues, so ensure it is fully charged and in good condition.
Identifying Faulty Components: Utilize a multimeter to test electrical connections and components. Check the voltage across the battery terminals and ensure it fits within the recommended specifications. Next, examine the fuses; a blown fuse often indicates a deeper issue within the electrical system.
Repairing Issues: Depending on the problem, some components can be repaired. For instance, frayed or damaged wiring can often be spliced or re-insulated, restoring functionality. Ensure connections are clean and free from corrosion to enhance conductivity.
Replacing Components: If repair is not feasible, replacing the faulty electrical component may be necessary. When opting for replacements, choose high-quality parts that are compatible with your motorcycle’s make and model. Refer to the service manual for specific instructions on disassembly and installation.
After completing repairs or replacements, thoroughly test the motorcycle to ensure that the electrical issues are resolved. This step will help confirm that your motorcycle is safe and reliable on the road.